
VR How to

How to create a new scene
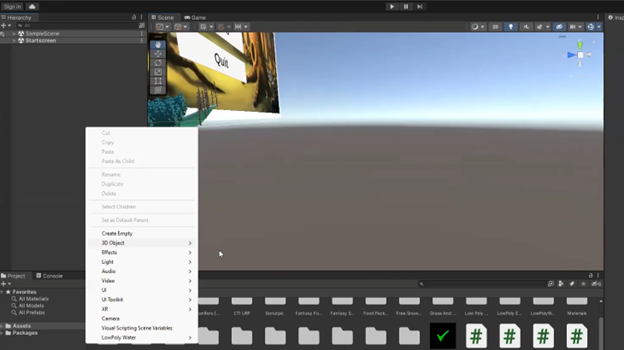
Adding a Surface:

  • Right-click on the Hierarchy panel.

  • Select "3D Object."

You'll need a surface for your character to move on. You can choose either a "Plane" or a "Terrain." In this example, we'll use a "Plane."

Adding a Surface

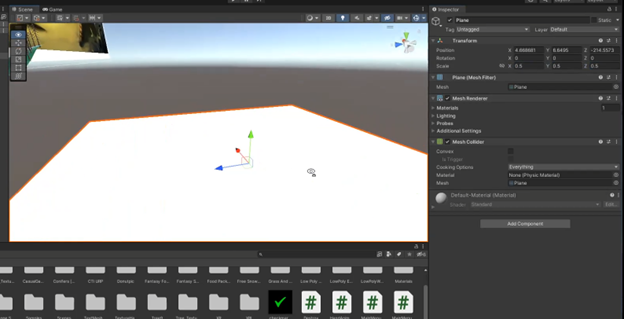
Adjusting the Surface:
  • Once you've added the plane, you can modify its properties.

  • To change its size, position, and scale, look to the right-hand menu when you select the plane in the Hierarchy.

Adjusting the Surface
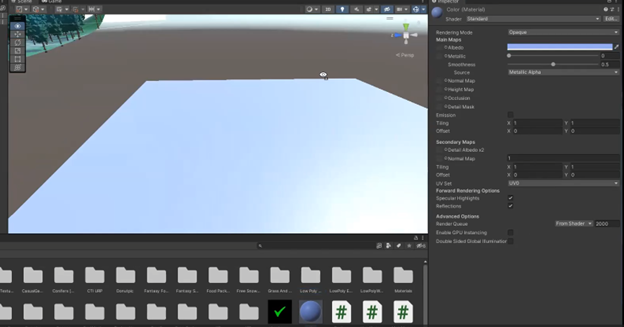
Changing Object Colors:
  • You can change the color of your objects by creating a new material.
  • Navigate to the "Assets" section at the bottom of the Unity interface.
  • Create a new material.
  • Choose the color you desire for the material.
  • To apply this material to an object, simply drag and drop it onto the object in the Hierarchy.

Changing Object Colors

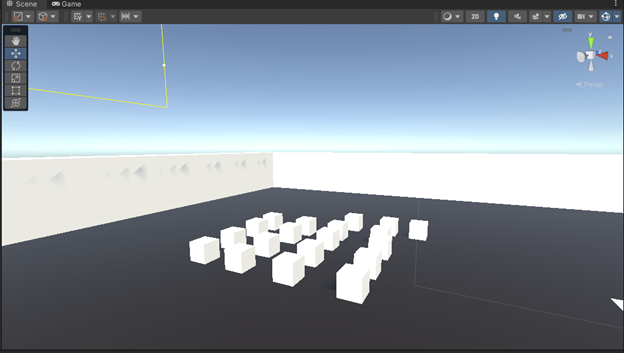
Enhancing Functionality:
  • To make your scene more functional, consider adding some cubes for the character to pick up.
  • You can also add walls to enclose the environment and prevent the character from falling off the edge.

Enhancing Functionality

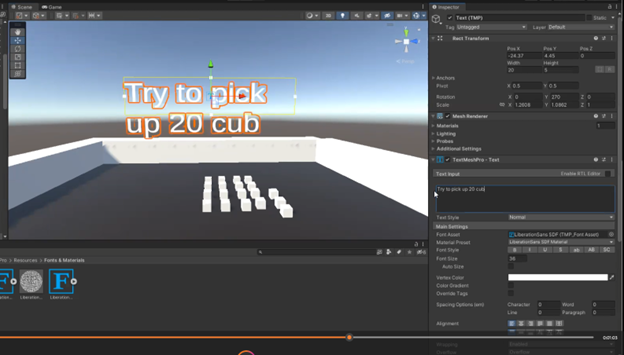
How to add text on the screen

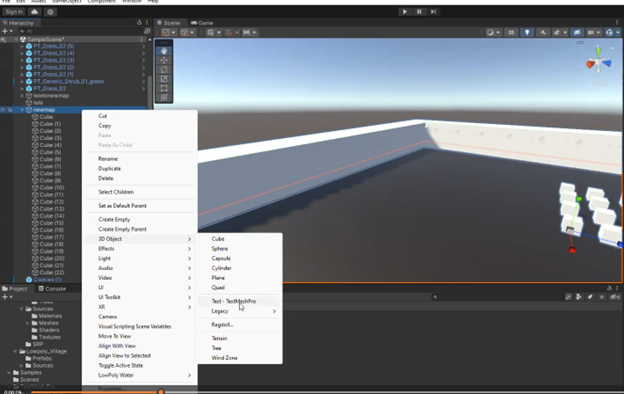
Create a TextMeshPro Object:
  • In the Unity interface, navigate to the "3D Objects" options.
  • Select "Text - TextMeshPro."
Create a TextMeshPro Object
Text Object Properties:
  • Just like other objects, you can manipulate your TextMeshPro object. Adjust its size, position, and other properties.
  • In the right-hand menu, you'll find various options to customize your text, including:
  • Font: Choose the font style for your text.
  • Style: Define the style of the text, such as bold, italic, or underline.
  • Alignment: Align the text left, center, or right, and set vertical alignment.

This allows you to be creative and craft your own unique text styles. Experiment with these options to make your text elements fit seamlessly into your Unity project.

By following these steps, you can easily add and customize text in Unity using TextMeshPro. This will help you communicate information and enhance the visual aesthetics of your scenes and games.

Text Object Properties

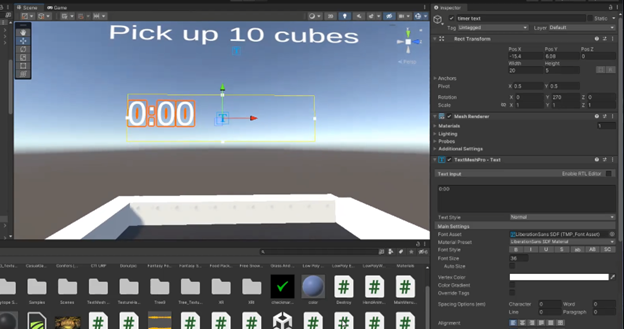
How to add timer on your project

1. Creating a Text Object (Similar to Previous Step)
 
  1. Creating a Text Object (Similar to Previous Step):

As a starting point, create a TextMeshPro object as we discussed in the previous section. You can customize its appearance and position.

  1. Adding a C# Script for the Timer:

To make your text function as a timer, you'll need to add a C# script. Here's how to do it:

In the Unity interface, right-click on an empty space in the Hierarchy or Project panel.

Choose "Create Empty" to add an empty GameObject to your scene.

Right-click on this new GameObject, select "Create Empty," and name it "Timer" or something relevant.

  1. Creating a C# Timer Function:

Right-click on the "Timer" GameObject in the Hierarchy panel.

Choose "Create Empty" or "Create C# Script" and name it "TimerController" or something appropriate.

Double-click on the script to open it in your preferred code editor.

General, the Unknow sources section must be enabled

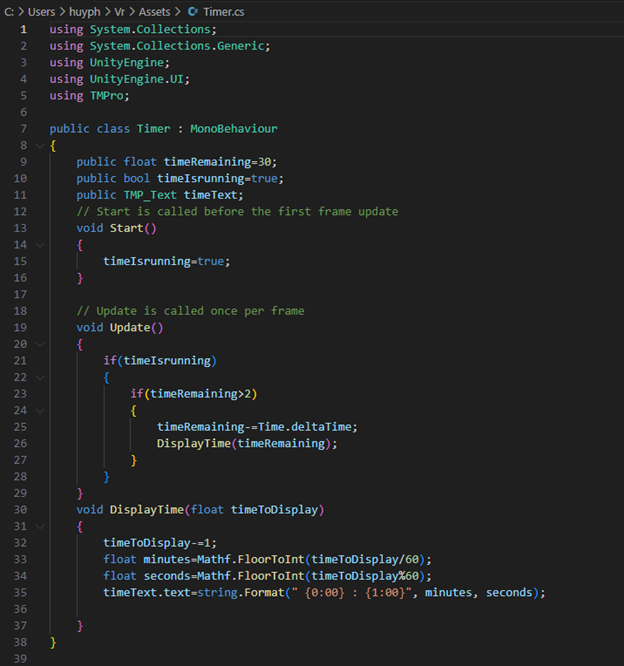
And this is the code for the timer and I will put the explanation for this code below:
  1. Import Statements:

This script includes several using directives at the beginning to reference necessary Unity libraries and components:

  1. Class Definition:

The code defines a class called Timer that inherits from MonoBehaviour. This means it's designed to be used as a Unity script that can be attached to a GameObject in the Unity scene.

  1. Public Variables:

Three public variables are declared at the class level. These variables can be edited in the Unity Inspector because they are marked as public.

    • timeRemaining: A float that represents the initial time on the timer, which is set to 30 seconds by default.
    • timeIsRunning: A boolean that determines whether the timer is currently running. It's set to true by default, meaning the timer is running when the game starts.
    • timeText: A Text Mesh Pro (TMP) text field to display the time remaining on the screen.


  1. Start Method:

In the Start method, timeIsRunning is set to true. This means the timer will start running when the game begins.

  1. Update Method:

In the Update method, the timer logic is implemented. This method is called once per frame.

If timeIsRunning is true, the following code executes:

    • Check if timeRemaining is greater than 2.
    • If it is, subtract the current frame's time (Time.deltaTime) from timeRemaining to count down the time.
    • Call the DisplayTime method with the updated timeRemaining value.
  1. DisplayTime Method:
    • This method is responsible for formatting and displaying the remaining time on the timeText field.
    • It takes a single parameter, timeToDisplay, which represents the time remaining in seconds.
    • Subtracting 1 from timeToDisplay seems unnecessary, as it doesn't affect the overall logic.
    • It calculates the minutes and seconds from the remaining time and formats them as a string with leading zeros.
    • Updates the timeText field to display the time in the format "MM:SS."

In summary, this script creates a simple countdown timer that starts at 30 seconds and runs when the game starts. The remaining time is displayed in minutes and seconds on a Text Mesh Pro (TMP) text field. The timer counts down in the Update method as long as the timeIsRunning variable is set to true.


Project Survey